I want to continue on with two posts I wrote before.
In this post, I showed a step-by-step setup for an ARM Template deployment in Azure DevOps.
In this post, I presented you ARMHelper: a module I created to help you with creating ARM templates.
Now, I want to dive a little deeper into those subjects. I will show you how to get started with YAML in the build step when creating an Azure Deployment in Azure DevOps (at this point, YAML is not usable yet in the Release-step. This will be available in the feature). We will go through the default Azure tasks to validate ARM Templates. After that, we will create some tasks where we make use of Powershell and the ARMHelper module to for example stop the build if it would overwrite existing resources.
Just interested in how to use ARMHelper in a pipeline? Click here
Let’s get started.
Why YAML?
In the last few months, the GUI that comes with the classic editor has been pushed back and Microsoft is encouraging you to use YAML for your Build pipeline (although the Release Pipeline is still based on the GUI). This seems strange as the classic editor is very user-friendly. But it has a problem: scalability. The classic editor is great for one pipeline. The clone option could be used for the next five pipelines. But what when you have 20 pipelines? Or a 100? That’s where YAML comes in. The configuration stays in a file within the repository, which makes the whole structure more transparent.
We are not going into the theory of YAML and the coding that much, as I want to focus on the options Azure DevOps gives you to make it easier to get into it. Microsoft has some excellent documentation about the logic and reasoning behind YAML in Azure DevOps, which I do recommend you get into when you are using YAML in production.
Prerequisites
- You have Azure DevOps set up already. If you have not, find out how to here.
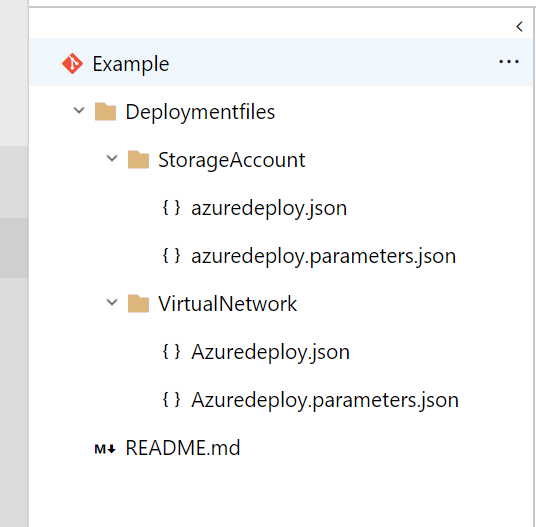
- You have the deployment files, azuredeploy.json and azuredeploy.parameters.json, ready. If you don’t have those, use these to create a basic storage account. In this post I am deploying a virtual network and a storage account as an example.
- I recommend you read the previous blogposts I have linked at the top of this post, I will not repeat the things mentioned in those posts.
The repository
In the repository, you can structure your deployment files in a way that makes you happy. I like to use named folders that all have azuredeploy.json and azuredeploy.parameters.json inside. This is the structure we are using:
Personal preferences play a big role here, if you prefer to use nested resources or give all json-files their own name instead of placing them in folders, don’t hesitate to do so.
Starting the YAML file
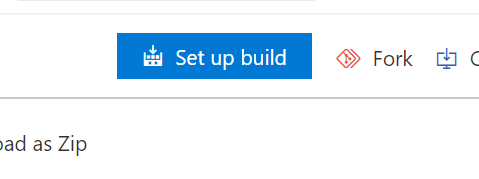
We start creating the YAML file in the webinterface. Open the repository (under Repo’s) and click Set up build in the repository.
Here you get two options: Starter pipeline or Existing Azure Pipelines YAML file. After you get used to YAML, you can create the files beforehand, place them in your repository and select them here. For now, select Starter pipeline.

You get the code for a very basic pipeline. We will walk through customizing it to our needs. One thing is very important to know beforehand and might not be intuitive if you are used to working with JSON and/or Powershell:
With YAML for a pipeline file, indentation matters! The code will fail if you get it wrong.
Trigger
You get to choose what will trigger the build. I prefer the build to run at every commit in every branch. So I change it to this:
trigger:
  branches:
    include:
    - '*'
Note: At this point IntelliSense gives an error in the editor, but it does work. I’m assuming this is a bug. Also, this is the setting that applies if you don’t define a trigger, but I like to define it anyway in case something changes in the future.
Read more about triggers here.
Pool
Here you define what agent pool image you want to use.
It is possible to use multiple agents, for example for testing on Mac and Linux. You can also prepare your own agent that you can customize to your needs. For this post, we will just use the one provided by Microsoft.
We are going to use the 2019 image.
pool:

vmImage: windows-2019
For more information about pools, click here.
You can now click Save and run, as we want to make use of the full options that are provided by Azure DevOps to make this process easier when creating steps. You don’t need to change any options on the next screen. At this point, a YAML-file will be created in the repository and a (at this point useless) build will run.
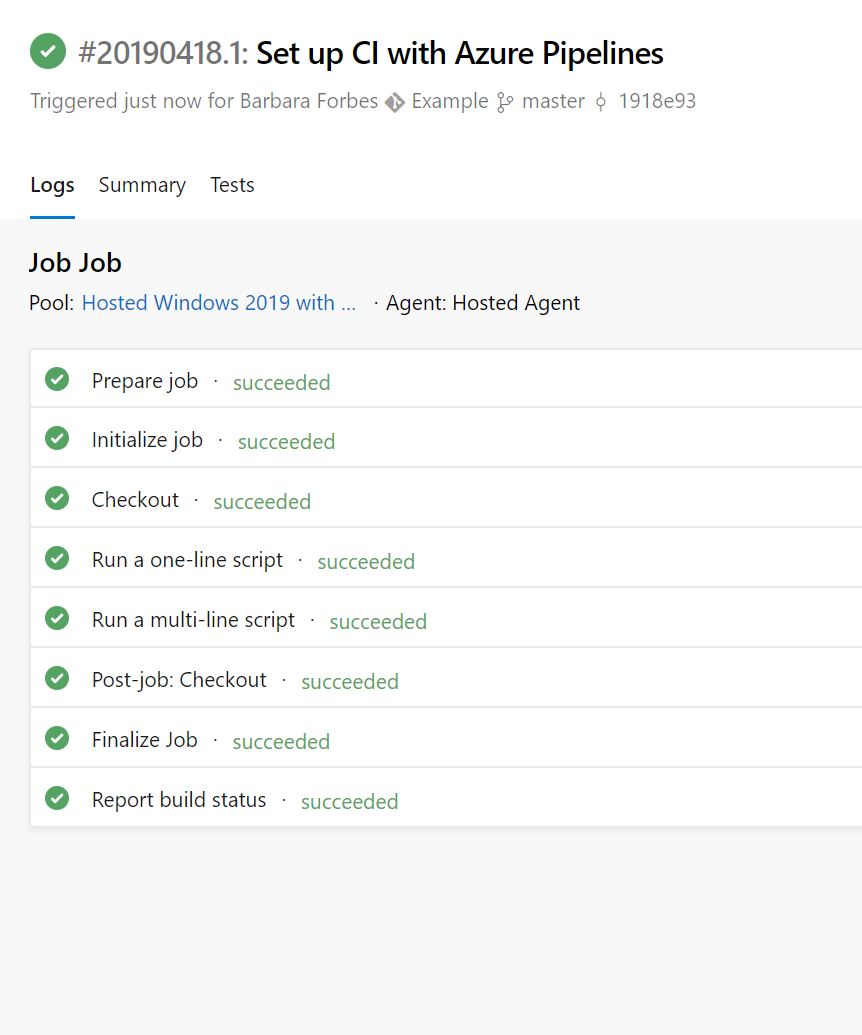
After the build is finished, you will find a new file in the root of your repository, azure-pipelines.yml
Creating the steps
For the ARM templates, we want to run these steps in the build:
- Validate the deployment in Azure
- Use ARMHelper to check for existing Resources and stop the build if any existing resources would be removed
- Use ARMHelper to show what resources would be deployed
- Publish the deployment files so they can be used in a release.
I want to show you two ways to accomplish this with little to no knowledge of YAML.
Use the online editor in Azure DevOps
We will use this method to create the validation in Azure.
Go to Pipelines, Builds. Select Edit above your pipeline
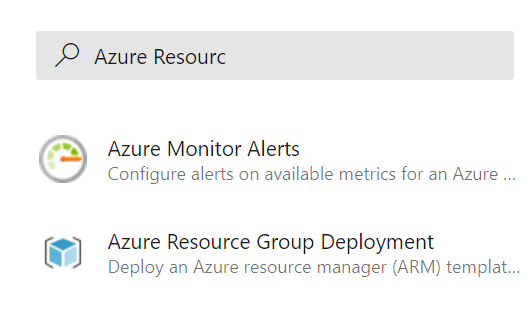
The online editor opens up, which provides IntelliSense and syntax highlighting. But more than that, you will be able to use the assistant at the right of the screen. Let’s try it out. Search for Azure Resource, so you can select Azure Resource Group Deployment.
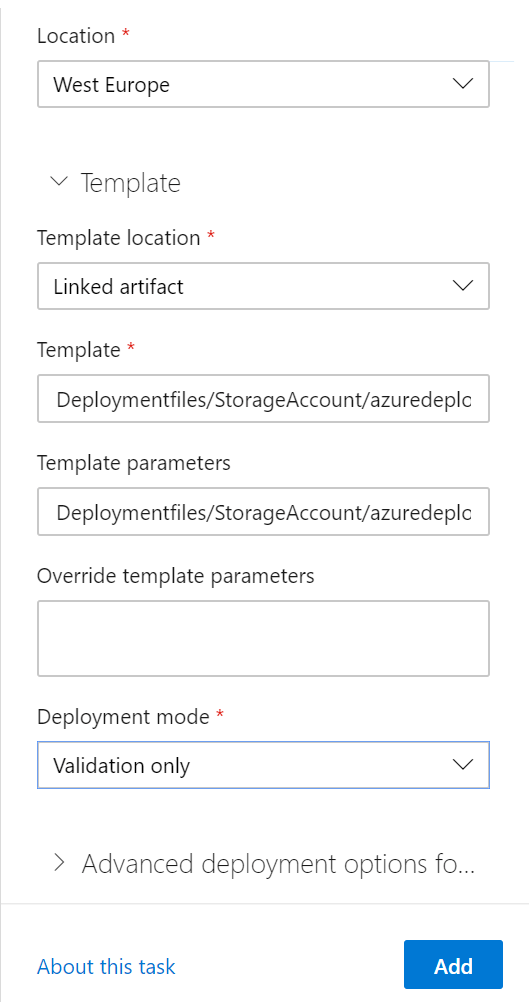
When you click it, you will see the fields you would see when using the classic editor. Fill in all the fields as you would in the classic editor (see my previous blogpost for more guidance).
NOTE: you need to have the service connection to Azure set up already for this to work. If you haven’t set it up, do it through the project settings or use the classic editor as described below.
When you are ready, you can add it to your YAML file. Delete the two script-tasks that Azure DevOps provided and put the cursor below “steps:”. Click add.
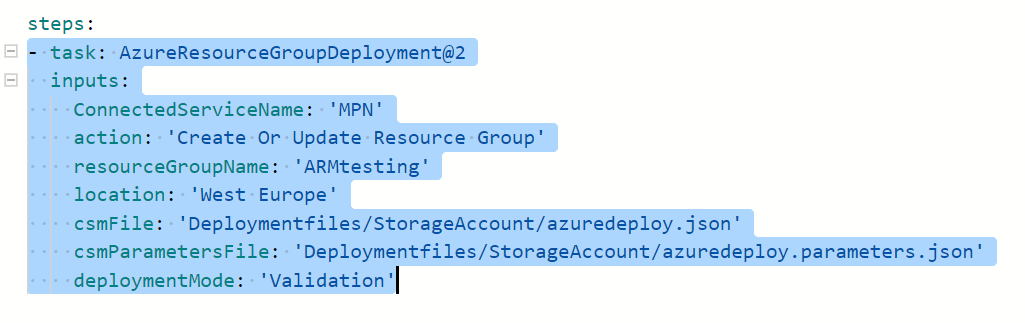
Your settings have been pasted into the YAML file. At this point you can easily copy these in the editor to create a second task for the Virtual Network. The editor will show syntax issues if they happen.
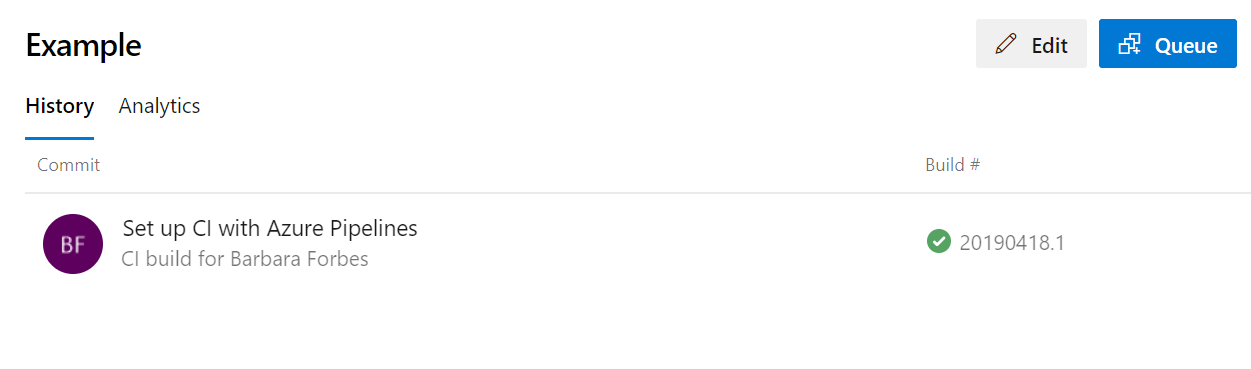
After you have added the second task, click Save. This will create a commit to the repository.
As we had defined we want to run the build on every commit, this will also create a new build. You can view it in the Builds pane.
Using the Classic editor and Visual Studio Code
So at this point we have the Azure validation steps ready and you should have a successful build.
Now we’ll try a second method, which I do prefer at this point as it has more possibilities and it challenges you to work with the code more. But it does take a bit more time.
In Visual Studio Code, install the extension Azure Pipelines for VS Code.
This will give you syntax highlighting, autocompletion and IntelliSense like in the web editor.
Open your repository and find azure-pipelines.yml in your root folder. This is the file we have just created online. We are going to add the next steps, the two ARMHelper options.
ARMHelper: Fail if resources are removed
To keep your existing resources safe, ARMHelper can be used with the command Get-ARMExistingResource. To use it, we use the Azure Powershell Task.
Open the web interface and open the classic editor. You can do this by going to Pipelines > Builds. Select New, New build pipeline.
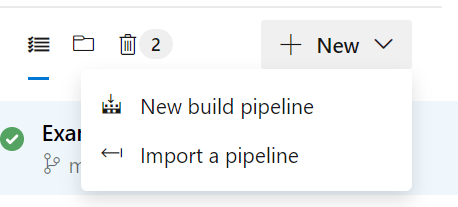
Click Use the classic editor at the bottom. Select the repository you’ve been working with. Don’t put too much thought into this as we aren’t going to save what we do here, this is just a method to get the code for our YAML-file.
Select empty job at the top.
Now, click the plus after “Agent Job 1” and search for Azure PowerShell. Click Add.
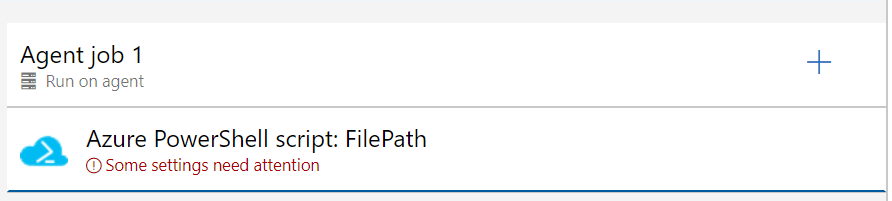
Fill the fields
<em>Note: Task Version 4 uses Az instead of AzureRM. While the module supports use of that, This task has some issues with it that I’m still investigating, but this task is still in preview. Check that Task version 3 is used, as this uses the AzureRM module.</em>
Enter your Azure Subscription Connection and choose Inline Script
First, you want to install and import the module (I do this in a separate PowerShell task in my own pipelines, to keep it all looking a bit cleaner. But for simplicity we will just add it to this first step.)
Install-PackageProvider -Name NuGet -Force -Scope CurrentUser
Install-Module -Name ARMHelper -Force -Scope CurrentUser
Import-Module -Name ARMHelper
Note: you can skip this step if you have your own agent, as you can just install the module once and only have to import it. Do remember to keep it up to date if you do that
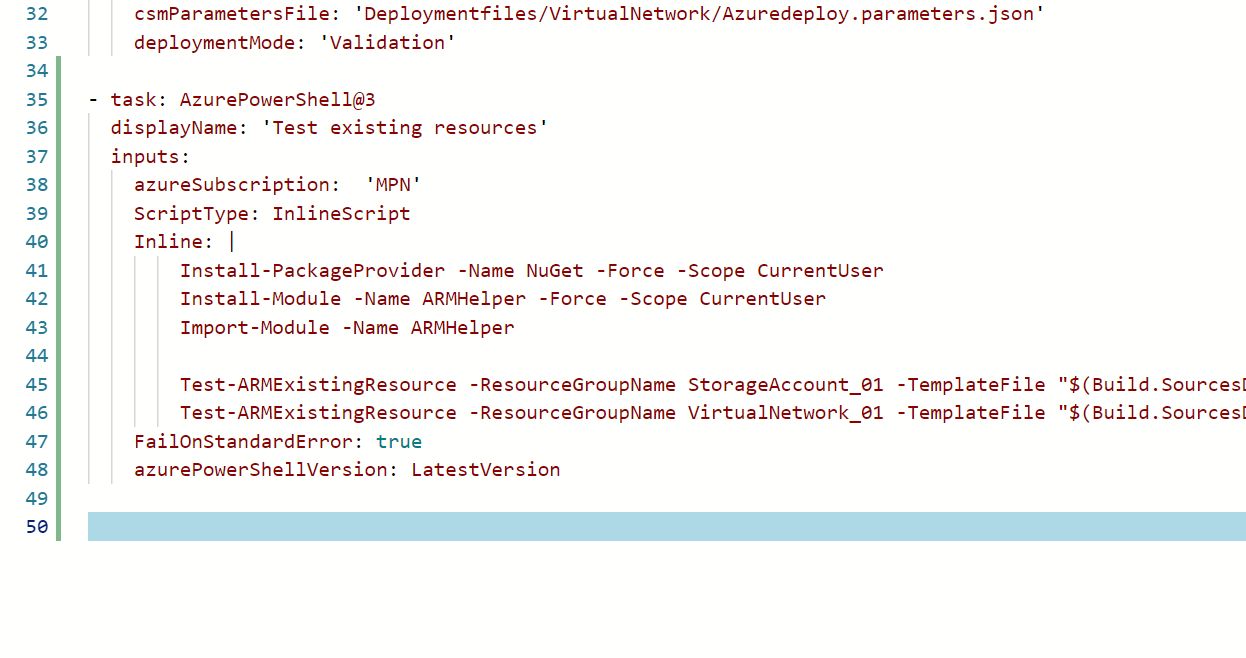
After this we will use Test-ARMExistingResource with the -ThrowWhenRemoving switch to make sure the deployment fails if it would remove resources. Keep in mind to run it against the resource group where the deployment would take place to make this work correctly. This resource group has to exist already.
This will look something like this
Test-ARMExistingResource -ResourceGroupName StorageAccount_01 -TemplateFile "$(Build.SourcesDirectory)\Deploymentfiles\StorageAccount\azuredeploy.json" -TemplateParameterFile "$(Build.SourcesDirectory)\Deploymentfiles\StorageAccount\azuredeploy.parameters.json" -Mode Complete -ThrowWhenRemoving

Test-ARMExistingResource -ResourceGroupName VirtualNetwork_01 -TemplateFile "$(Build.SourcesDirectory)\Deploymentfiles\VirtualNetwork\azuredeploy.json" -TemplateParameterFile "$(Build.SourcesDirectory)\Deploymentfiles\VirtualNetwork\azuredeploy.parameters.json" -Mode Complete -ThrowWhenRemoving
(This could be cleaner in a loop, but now I know for sure it uses the right resource group.)
Select Latest Installed Version for the PowerShell Version.
Now, the fun begins. At the top of your task, you will see View YAML. Click it and copy the code that gets provided.

Go back to your YAML-file in Visual Studio Code and paste the step at the bottom.. There you will have all your settings in YAML. You do need to remove “-steps” above your task, as you only need to call steps once.
The code that is copied is quite intuitive if you keep the structure you just saw in the GUI in mind.
You can now close your browser and let it remove unsaved changes.
ARMHelper: Show what resources would be deployed
This step isn’t an automated one, it will not fail if the deployment is incorrect.
What it will do is create a list of all the resources that would be deployed if this build was released to Azure. It can be used for a final manual check or for making the review in a pull request easier.
To use it, you can copy and paste the code above. Change these things:
- Change the displayname to an appropiate one
- Remove the module installation and import lines, as this step runs on the same agent
- Change “Test-ARMExistingResource to “Test-ARMDeploymentResource”
- Change “-ThrowWhenRemoving” to ” | Select-Object *”
And that’s it. This shows how in the long run it is a timesaver to use YAML instead of the Classic editor.
Publish the deployment files so they can be used in a release
With the information above, you can now choose your favorite method to publish the files. The task is called “Publish Build artifacts”. If you have trouble, you can see my YAML below.
Results
The Complete YAML File for this build:
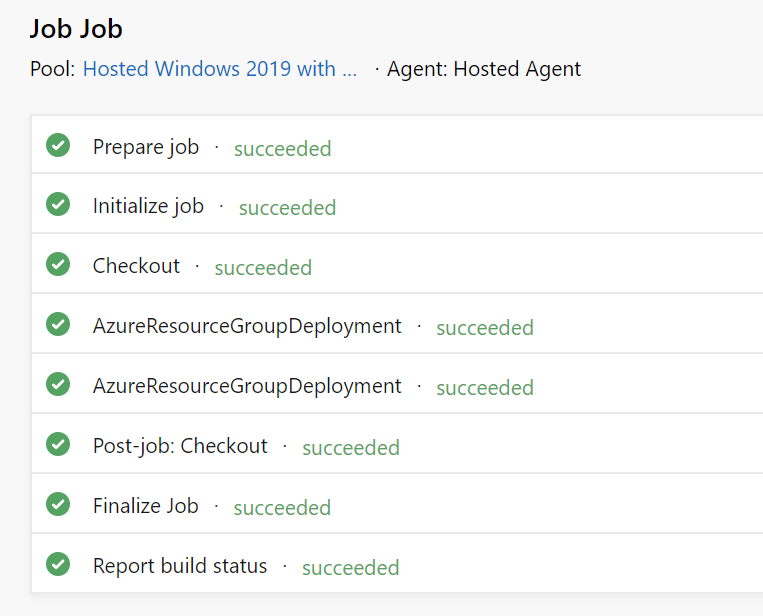
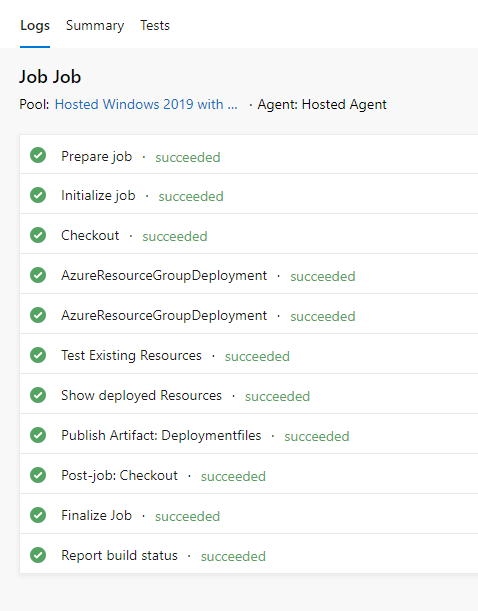
This is the build it will run
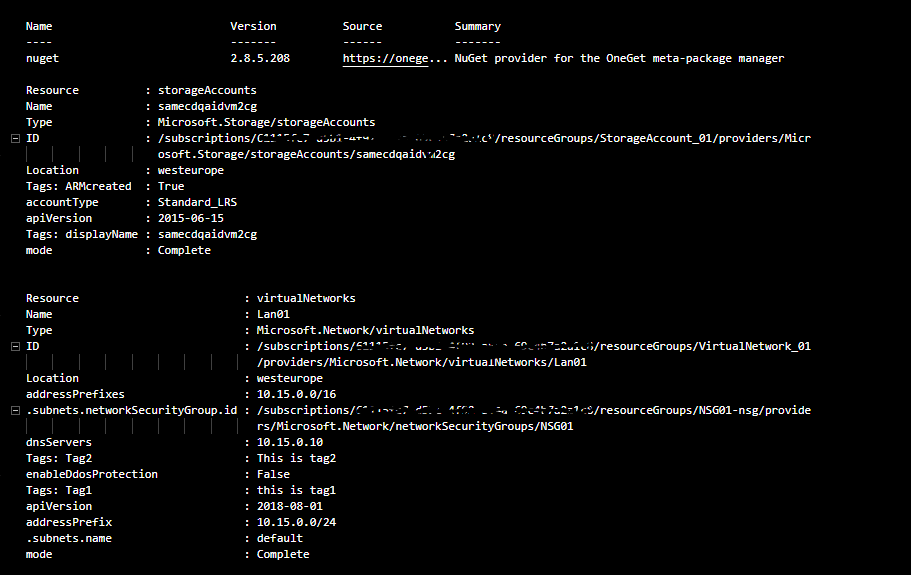
And when you click Show Deployed Resources, this is what it will show:
Release to Azure
So now you have a complete build pipeline, set up with YAML. At this point you can’t expand your YAML file to include a release to actually deploy the resources to Azure, although it it on the roadmap.
I could write this all up, but this process hasn’t changed since my last blogpost, so I would like to refer you to that (link goes straight to that part of the post).
And that’s it. I hope this helps you to start with YAML and to make full use of the ARMHelper module.


Pingback:ARMHelper: A module to help create ARM Templates - 4bes.nl
Pingback:Step by step: Setup a Build & Deploy pipeline in Azure DevOps for ARM templates - 4bes.nl
Pingback:Use Azure DevOps YAML Multi-stage pipelines for ARM Template deployment - 4bes.nl
Thank you very much, I really can’t stress how useful this has been.
bruh! you a maven my guy. god bless you