This week, a long awaited feature was announced. YAML Multi-stage pipelines in Azure DevOps have gone into public preview.
So what’s the big deal? Well I am very excited as this is one step further to a completely coded deployment that can easily be reused, while Azure DevOps provides security, auditing and structure. The deployment of the code now becomes code that can be managed, shared and developed as such. These developments are what gets Infrastructure as Code and Azure DevOps to be an Enterprise solution. With this post, I want to walk you through creating YAML Multi-stage pipelines for ARM Templates
Update June 14th, 2020
Since this post was written, a lot of new options and features have become available. For this reason, I created a new post.
While the base of this post still applies, I recommend reading my new post which you can find HERE
Creating a CICD pipeline to deploy ARM Templates to Azure: The series
This is a follow-up on these posts I have written before:
Step by step: Setup a Build & Deploy pipeline in Azure DevOps for ARM templates
Setup a build pipeline in Azure DevOps for ARM Templates Part II: using ARMHelper and YAML
In the first post, I created a basic Build and deploy pipeline with the editor in the portal.
Then in the second post, a YAML file is created to replace the build and add ARMHelper steps
In this post, I want to take this new feature to replace the deploy-tasks and have a full deployment in code.
If you are new to Azure DevOps pipelines or are curious about why I use the tasks that I use, I recommend taking a look at these posts first.
Activating Multistage pipelines
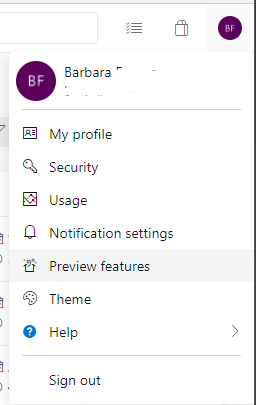
As this is a preview function, you need to manually activate it in Azure DevOps. You can click on your profile picture and find preview functions.
You can find and turn on Multi-stage pipelines here. Can’t find the option? Hang in tight, because it is deployed to all tenants as we speak.
Read more about your options here.
The new interface
So when you enable this feature, some things change in the menu. Builds are replaced for pipelines and environments

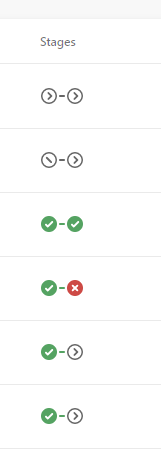
When you click the pipelines, you can click on each pipeline and see the different stages and there status.
Releases stay as they are. My guess is that they are there as a fallback for options that are not yet covered in the new pipelines.
I will not go into Environments in this post.
Getting started with a multi-staged pipeline
To help understand what we are aiming at here, I have used the traditional release editor (which is still available in the Azure DevOps portal) to create an example multi-staged pipeline.
Take a look at this:
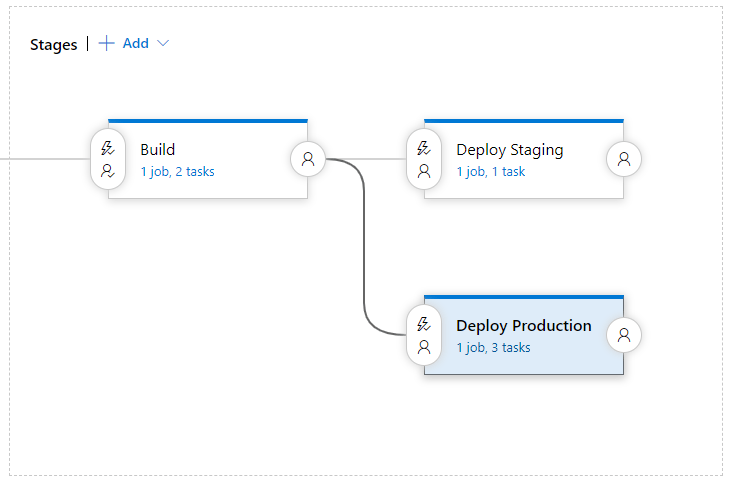
This is a possible implementation for a build-release-pipeline, where you get CI and CD into one, instead of the separation that exists at this point.
Every building block in this picture is a stage. In the stage are jobs running on an agent. Within the jobs are tasks.
This is a structure we can now implement through a YAML pipeline.
A lot of things are the same as the GUI and will be recognizable. There are some options missing, but I wouldn’t be surprised if they were added in future updates.
We will first take a look at the syntax related to our need and the workarounds we might need compared to the GUI.
YAML Syntax
The syntax we need is basically this:
If you look back at the YAML-file we already create for the build, all those steps would be in one stage.
For a full deployment, we could use two stages: Build and Deploy.
When adding the elements we already had (triggers and variables), it would look something like this:
The thing that took me some getting used to is the indentation. Working mostly with JSON and PowerShell, I’m not used to that being needed for something other than readability. The good news is that the code editor in the Azure DevOps-portal is very nice to work with and has some error handling.
Using the multi-staged pipeline for ARM Template deployment.
I want to walk you through a CICD pipeline to first perform tests on an ARM Deployment and then deploy it to Azure.
Preparation
Let’s start with an existing repository with at least one template and parameterfile. Also, I assume you have a YAML file for the build set up already. I will be working with the repository that has been set up in this post. The YAML-file I start with is found here
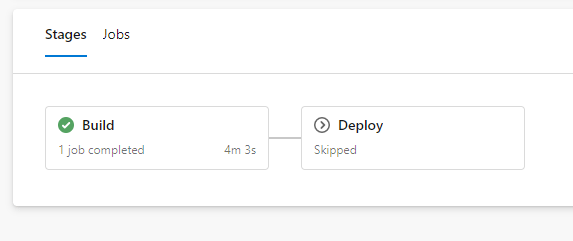
If you run the existing build, you get the following result:

Adding the stages
The pipeline is now a single-stage pipeline.
We want to create a two staged pipeline, so the second stage deploys the resources to Azure.
When you open the pipeline, you can see the “edit” button in the top right to open the online editor.

Let’s change the first part of the YAML file to this:
After that we can continue with the tasks in the original file, with one little catch. You need to add 4 spaces to the front of every line, to correct all indentation. I have not yet found an easy fix to do that, please let me know if you have one!
This is a pipeline that can be ran and it will succeed the same way the old one did.
We are going to add a stage to deploy the resources.
As the build and deployment now run in one file, there is no need to publish the build artifacts. You can reach the files from the repository directly. So remove the PublishBuildArtifacts@1-task from your pipeline and add these lines at the end:
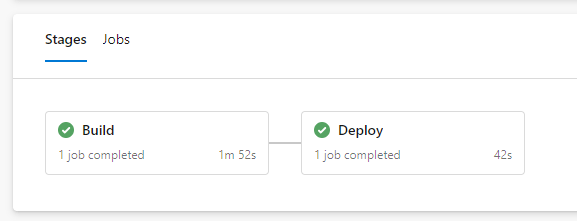
And now, we have a multistage pipeline!

DependsOn
By using dependson, you can set the sequence in which the stages would be run. You have named the stages (in our example its Build and Deploy). In every stage, you can define this:
dependsOn: NameOfStage
And the stage will run after that stage. You can add multiple stages if you want to. The stage will not run if the dependsOn-stages have not completed.
Conditions
While we don’t really have a need for dependencies in this example, there is something missing at this point.
With the current pipeline, the deployment to Azure would happen at any commit, even if they were done to different branches than master. This is not ideal of course.
In the old settings, I preferred to have manual triggers, as the direct connection to production deserves a check to make sure. This isn’t an option by default, but with Conditions we can come pretty close.
Conditions can be set for every stage. One that would be very usable for this example is
condition:

and(succeeded(), eq(variables['Build.SourceBranch'], 'refs/heads/master'))
With this line, the stage only runs if the branch is master and the previous stages have succeeded. At least now the deployment will only run when master has been updated. You could create security with branch policies.
Let’s take this a step further. You can use all variables in the pipeline for the condition.
We have the option to add a variable called State, that by default is set to Dev. We could add it like this at the top of the YAML.
variables:

State: Dev
For the condition, we can add these lines:
condition:

and(succeeded(), eq(variables['State'], 'Production'))
(for all these examples, do remember that indentation should be corrected)
Now, the second stage runs only when the state-variable is changed to production (and the build has succeeded).
To make it easier to do this manually, we can make use of the variables we can add when we run the deployment from the Azure DevOps portal. You do need to remove the variables from the YAML file though, as they will overwrite Build variables. So remove the variable for state, navigate to the pipeline and click run Pipeline in the top right.
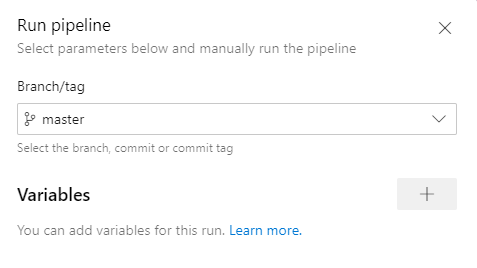
Click the plus-sign to add a variable and add State with value production.
If you click run, you will find the second stage runs.
You could of course add on to this. You could for example now create three separate stages to create a DTAP cycle based on that one variable. There are truly a lot of possibilities.
Conclusion
So that’s it, we have created a YAML Multi-stage pipelines for ARM Templates and our deployment pipeline now completely lives in code. If you are familiar with YAML for the build, you can add on the CD-part in no-time. Of course there are more possibilities and I’m sure more features will be added in the future. But this new option is certainly worth your time to dive into.
You can find all the files we have used in my Github, with azure-pipelines.justbuild.yml.yml being the starting point and azure-pipelines.yml the end result.


Hi Barbara,
Thank you for your blogs series. I followed your posts and I implemented the multi-stage build pipeline and classic release (I have the Azure Resource Manager Templates to deploy to different resource groups).. And now I wanted to create the release pipeline with YAML, but I’m getting the following error when I’m using the YAML template:
124: “/Build/BuildProdARMTemplate.yml@templates (Line: 9, Col: 1): Unexpected value ‘jobs'”
I do not understand why?
I have activated Multi-stage pipelines” feature and it works in my original pipeline without template.
Do you have any tips how I can solve this issue?
Best regards,
Aleksander
I think I found it.
Your template are for the Jobs, and I was using them as Tasks.
I’m investigating now this…
Hi Aleksander,
Did you find the solution?
If not, could you post the YAML file you use? You can of course leave out any personal information.
Regards,
Babrara
Hi Barbara,
For the deploy (release) stage, why aren’t you using the special deployment job?
https://docs.microsoft.com/en-us/azure/devops/pipelines/yaml-schema?view=azure-devops&tabs=schema#deployment-job
Hi Eric,
Thank you for your question.
To use the deployment job, an environment is needed. At this point Environments only support Kubernetes, so they are not really useful for deploying ARM Templates.
It seems to be possible to create a deployment job with an empty environment, to get a more clear history. I have not used this option yet, so I can’t say if that is worth it. I am putting it on my to do list :).
Hi Barbara!
Very nice article and usefull!
In the YAML pipeline editor in Azure DevOps you can simply select all your steps and press Tab or Shift-Tab to increase or decrease indentation of the entire selection.
You mentioned that publishing a pipeline artifact is no longer needed, but I suppose that really only applies to deploying an ARM template, and not when also deploying application code. After all, these jobs from different stages run on different agents, and I do notice that the ‘Deploy’ job does a fresh check-out of the repository, so that means we’ve lost any output from the ‘Build’ job.
When using the special deployment job it will automatically download the pipeline artifact instead, but now I’m struggling to point at my ‘csmFile’ inside that artifact.
You are correct that this approach uses the source code for deployment instead of a pipeline artifact.
It assumes no build of the code is needed, only testing.
If you do want to use artifacts, You should be able to use the PublishPipelineArtifact and DownloadPipelineArtifact. I haven’t used these much myself for ARM templates, So I would have to look into how they work exactly.
Pingback:Azure Devops for PowerShell - #AzureAdventCalendar 2019 Day 15