In Part 1, we got started with Azure DevOps job and step Templates for our ARM deployment pipeline. In this post, I want to take steps a bit further. Let’s work with job templates in a dedicated repository.
But why?
Before, we created task templates in the same repository. We made it easier to run parts of the pipeline for multiple resources without copying the code. This is very handy for a standalone repository. But if you work in an organization, you want the consistency of a shared template repository. This way, a standard way of testing and deploying can be shared through all teams and developers. It saves time and improves quality.
Note: Tasks can run from a remote repository and jobs can run in the same repository. I handle them in this order as an example.
The goal
To see it in work, I want to create a repository with dedicated templates. I’m going to use it for the pipeline we handled before, where we deploy two resources through ARM templates: a storage account and a virtual Network.
If you want to follow along, I start out with the files in this folder and I end up with the files in this folder.
You should treat those folders as repositories, with the folder pipelines being a separate repository.
The basics of the step template creation are in Part 1, I recommend you read that post before you read this one.
Create the templates
First, let’s create the templates. For this we need a new repository. I named this one Pipelines. Depending on your Azure DevOps structure, you can create a dedicated project or add it to an existing project. It does have to be in the same organization as your pipeline. My pipelines-repository is in a project named Templates.
The pipeline that uses the template will determine the context, so for example the Azure Connection need to be in the project that does the deployment.
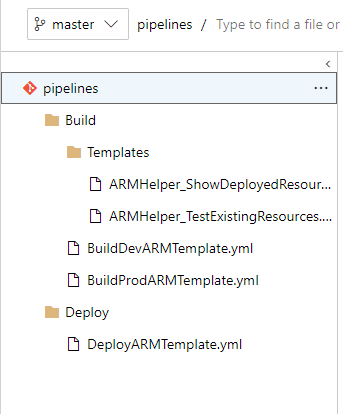
In VSCode I clone the repository and create a folder structure. This is to show you an example of how you could arrange your templates.
As you can see I created a separate folder for templates within the folder for Build Templates. I want to write task templates and use them inside the job template. This way I can eliminate creating the same task as much a possible.
Note: In this repository are only ARM template related tasks. Of course, the sky is the limit and you can use Job templates for every task you can think of.
So let’s look at the new files I have created.
The step template files
The two templates in the template folders are based on the task templates we used in the last post. They are separate now to add flexibility. I added logic to the PowerShell part to make sure the module isn’t imported twice. The parameters are on top of the file as I showed in the previous post. Below is ARMHelper_ShowDeployedResources.yml
To see the other template file, click here.
The Build and Deploy Templates
In the Build folder, I have a Development template and a production Template. These are created for a situation where there is different testing required for development and production. In this case, the production templates tests for resources that would be removed, which is not needed for development.
In the Job template, I make a call for the step templates. The parameters can be used recursively, so I make use of that.
The result for the file BuildPRODArmTemplate.yml is as follows (still looking for a better way to handle those parameters repeating ):
As you can see, it will run the two templates with the parameters that are set at the top.
The other templates are of similar structure and can be found here.
Important: Don't forget to use a parameter in one way or another in the Job name, as this has to be unique across the pipeline.
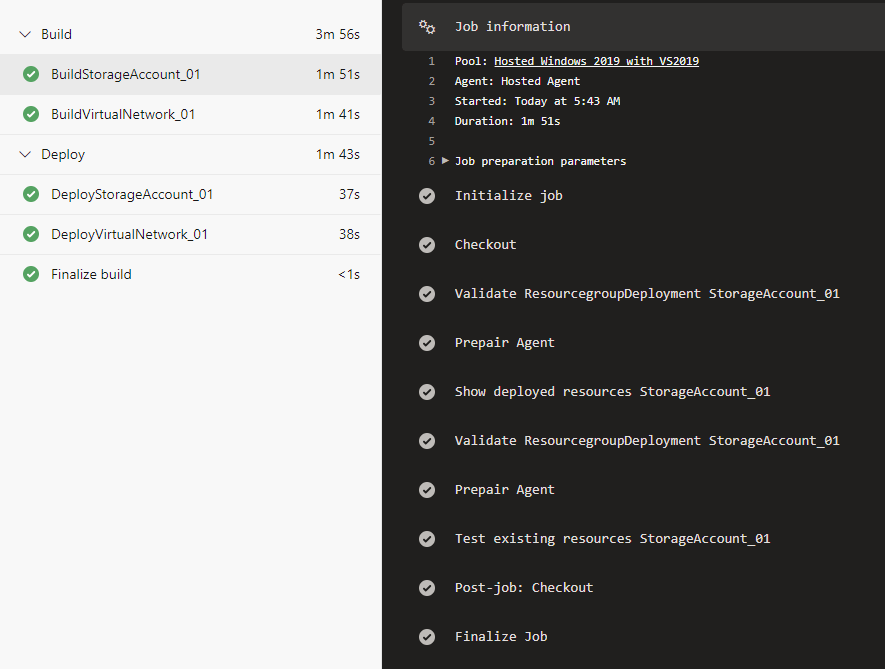
The pipeline for the ARM deployment
Let's get back to the pipeline we created the last time, to deploy a storage account and a vnet. At this point, I can link all jobs in this pipeline back to the pipelines-repository. To do this, I create a resource at the top of the pipeline:
Under name, the first word is the project. The second word is the name of the repository. The word after "repository" is the way you can reference throughout the pipeline. Now if you want to link a template like you did before, Use the following syntax:
- Template: Folder\file.yml@repository
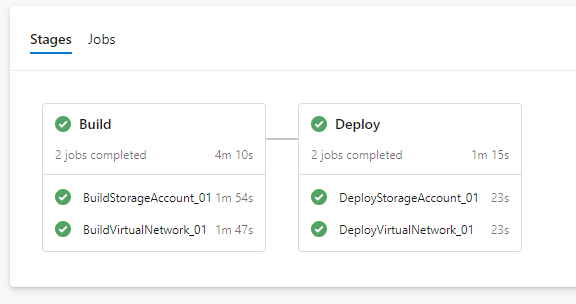
So in this case, I used this code as the build stage:
Now we can create multiple resources through this pipeline and make sure they all use the same build and deploy steps. (The complete pipeline can be found here ).
Conclusion
So once you get the hang of it, you can quit quickly build dedicated repositories for all your deployment processes.
When you get started, you will find that the error messages in the portal are very useful. They actually tell you at what template the error took place, even if it is nested.
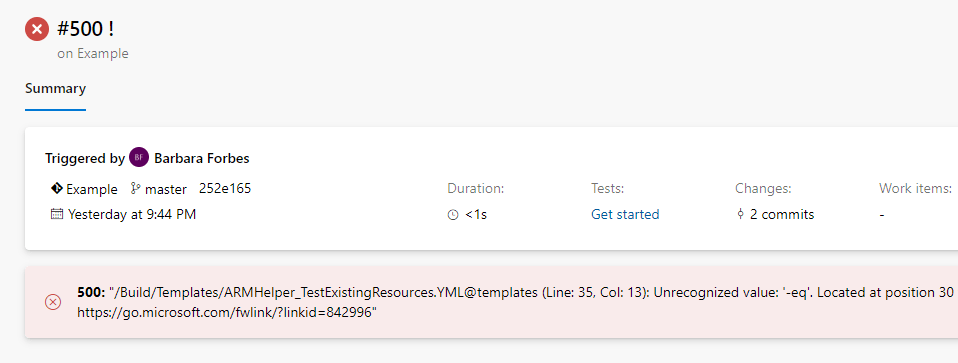
(yes, my 500th pipeline run had commit message "!". It was late. And of course it's a failed pipeline.)
In my opinion this is an very useful way of keeping control in your pipelines, especially if you have multiple teams deploying. And even if you are just on your own, it saves a lot of maintenance and copy-paste actions. So I encourage you to go try it out.
I do realize this can all be a bit confusing, so I again refer you to the folder I have created on my Github to see all files used. To have it be usable you should treat it like the folder Pipelines is in a separate repository.
If you have any questions, don't hesitate to reach out in the comments or on twitter


hi Barbara !
again I have to say your explanation regarding the arm pipeline articles are remarkable!