I have written before about how you can start working with Azure PowerShell functions and how you can connect to a storage queue and CosmosDB. For this post, we will see how you can use PowerShell in Durable functions. This functionality has been in public preview since August 2020. While some documentation is available, I want to focus on a practical example. This will be a bit of a step-by-step guide on how you can create your own Azure PowerShell Durable functions.
But why?
So why should you care about durable functions? Well, they provide some functionality that Azure functions don’t offer with the other bindings. The most important one is that it provides you with a state. This sounds vague, but what I mean by that is that you are able to keep track of what your functions are actually doing and have them interact with each other.
There are other ways to have functions interact with each other or with data, like the message queue or with a CosmosDB. But with durable functions, you are able to keep track of what the status of your functions are, what the results are and act upon that data.
To get a very detailed explanation of Azure Durable functions in a PowerShell context, I recommend reading this excellent post.
Limitations
Before we start, I think it is good to mention the limitations of Azure PowerShell Durable functions at this point. Not all durable scenario’s are supported in PowerShell at the time of writing this post. You can only use two patterns: fan and chaining. This post will be focused on these two structures. Even if you don’t find that much use for the current patterns, I think it is definitely worth it to find out how durable functions work, for when the other patterns become available. When more patterns are available I will create new blog posts and add the links here.
Prerequisites
There are some resources I strongly recommend using before following along with this post. These are all step by step guides, designed to show the basics.
- If you are completely new to Azure Functions with PowerShell, I recommend you first read my previous post on the subject. Note that the visuals have changed a bit since that post was written, but I think it is still clear to follow along with.
- We are going to make use of local development in Visual studio code. Is this new to you? Follow this page in the Microsoft Docs to see how it works. If you want to quickly prepare your device I have a script available for that.
- Microsoft Docs provide a very well-written guide on starting out with an Azure PowerShell Durable function. I recommend following that guide if you are starting out just to get a feel for what we are going to do.
- Take a quick view at what durable functions are in this Doc. Take a look at the images for Function chaining and Fan out/Fan in, as we will work with these options in this post.
Some tips for development in Visual Studio Code
While I was playing around with Durable Functions, I came across some issues that you might experience as well, so I want to mention these tips:
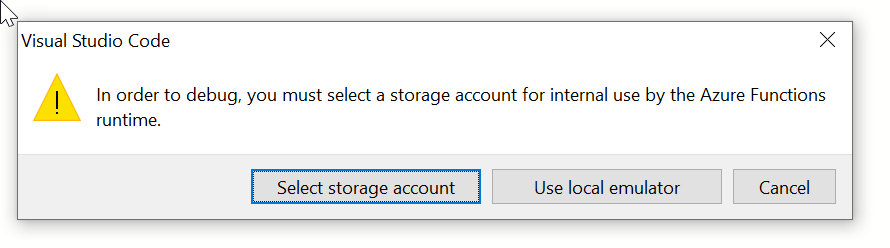
- Use a storage account for the durable function, even when developing locally. I am not sure if emulated storage is supported, but I could not get it to work. I connected an existing storage account by using the debug functionality as described in the guide I mentioned previously.
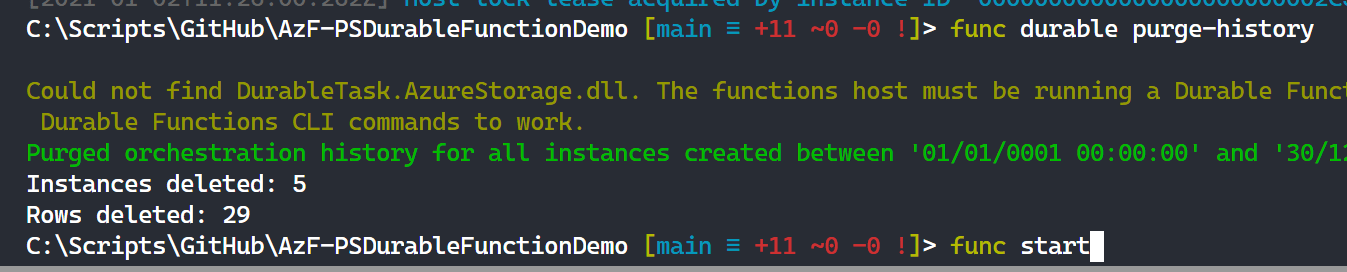
- If you are playing around, the queue in your storage account can become messy. You might find your function still running old commands when you run
func start. To fix this, you can perform cleanup in the storage account between tries. The following commands are useful when using function core tools.func durable purge-history
This removes the history of your function. More info here.func durable delete-task-hub
This option competely removes all the task files from the storage account (they will be reinstated when you runfunc startagain after deletion is completed). More info here.
- Error messages can be a bit confusing when called from the Orchestrator. Make sure your activity functions are working correctly before calling them from the orchestrator. Also, output matters more than you would expect. A function needs to return something to the orchestrator, even if you don’t use it. Work with Write-Host and Write-Output to create readable output and direct the output of functions to variables to make sure that is not the issue.
Use case: Create a storage account name and a storage account
To show how a durable function can work, I have created an example. We make use of a function that can generate a unique Storage Account name based on a word-list. It will check if the storage account doesn’t exist. After that, the storage account will be created by a separate function. And to make use of fanning, we will make it possible to create multiple storage accounts by only calling the function once.
Set up the base
First, let’s create the function base for local development. We are going to use Visual studio code.
Create a new project and add the following functions:
If you get stuck somewhere, first follow the guide in the prerequisites that shows how you can make a local version of the function.
Name: Orchestrator
Template: Durable Functions orchestrator (preview)
Reason: In this function you will orchestrate the other functions. So you will define the patterns you want to use for the actions
Name: HTTPStart
Template: Durable Functions HTTP starter (preview)
Reason: You start the orchestrator through the http-start. Here you can define parameters as well.
Name: getstorageaccountname
Template: Durable Functions activity (preview)
Reason: This is the first activity, it generates a storage account name. We can later call it through the orchestrator
Name: newstorageaccount
Template: Durable Functions activity (preview)
Reason: This is the second activity, it creates a storage account. We can later call it through the orchestrator
Add the activity scripts
The activity functions we just created are a lot like functions you might already be familiar with, that are called through an http request or a schedule. So for this post, we are just going to copy and paste the code.
Note: You should read every script you copy and paste from the internet. If there is something unclear, don’t hessitate to ask in the questions.
For the getstorageaccountname function, copy and paste the script in this link to the run.ps1 file
For the newstorageaccount function, copy and paste the script in this link to the run.ps1 file
Change the resource group
In the newstorageaccount function a resource group is hardcoded. Change this resource group to one that exists in your Azure environment (or create one for it).

Add a storage account setting.
Now, add a connection string for a storage account. I find the easiest way to do that is by pressing F5 (debug), as it will collect the connection string and setting needed for you. You can choose to use an existing storage account or create a new one from Visual Studio Code. After you have added the storage account, you can close debug mode by clicking disconnect ad the top of the screen
Call the function
Although the function is far from ready, we will start with calling it to see how that works.
Note: The function doesn’t work at this point and will generate a lot of errors in the background. Don’t worry about those, we are going to fix them later! The purpose of calling the function now is so you know how it works and can keep using it as we are developing.
When you run func start, you get the URL you can use:
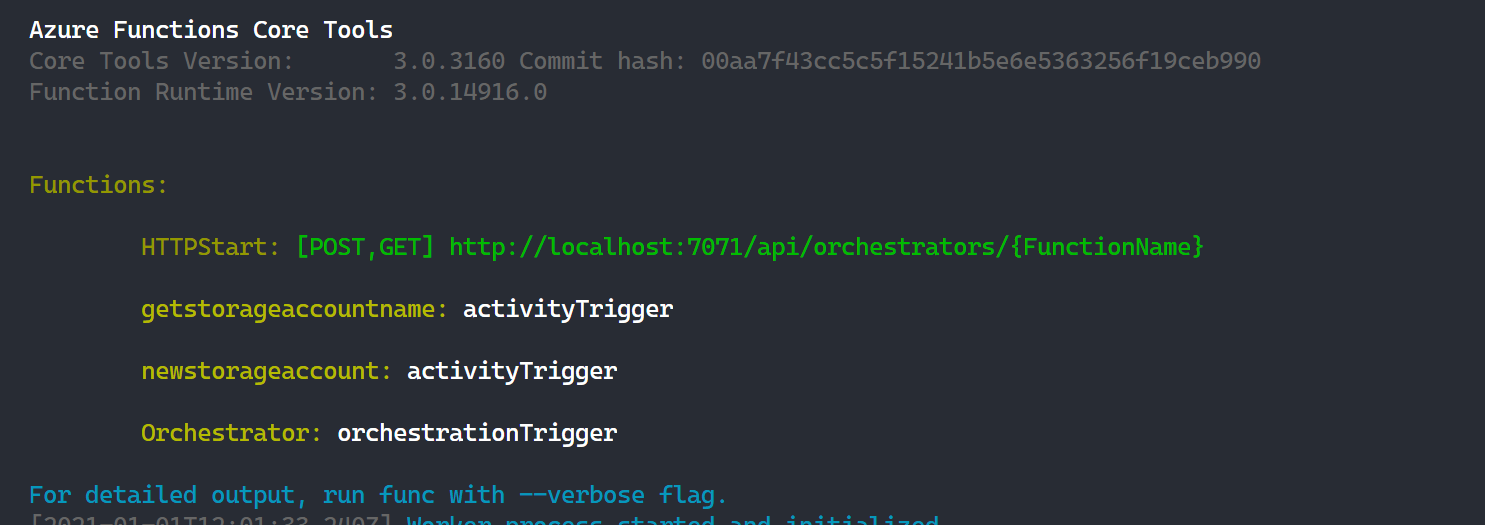
As you see, you need to define the name of the function yourself to call the function HTTPStart (which triggers all the other functions). In this scenario, the URL would be http://localhost:7071/api/orchestrators/Orchestrator .
So to test it out, open a different PowerShell terminal and enter the following:
Invoke-RestMethod http://localhost:7071/api/orchestrators/Orchestrator
This will result in a bunch of URIs on your screen
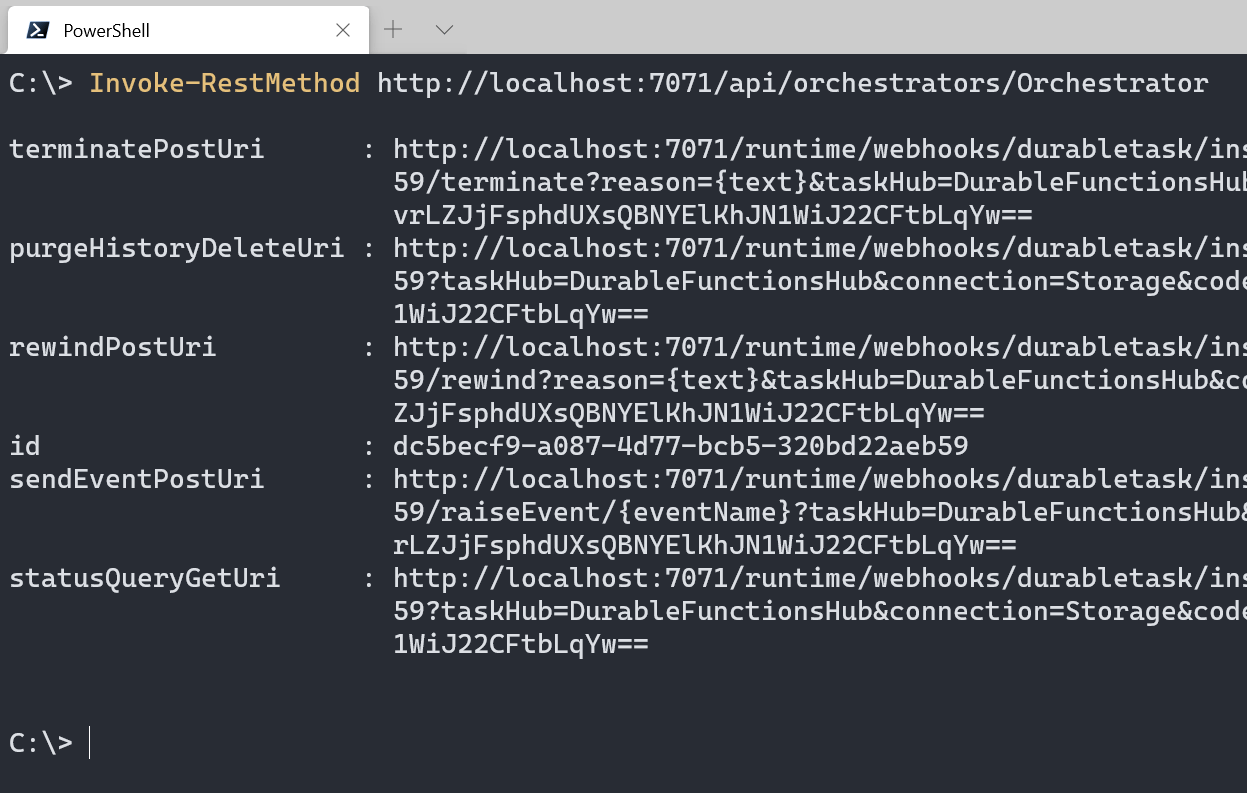
This doesn’t mean that your function is done running. It just means that it has been initiated and you are able to interact with it through the URIs.
In this guide we will make use of statusQueryGetUri, which will show you what the state of your function is.
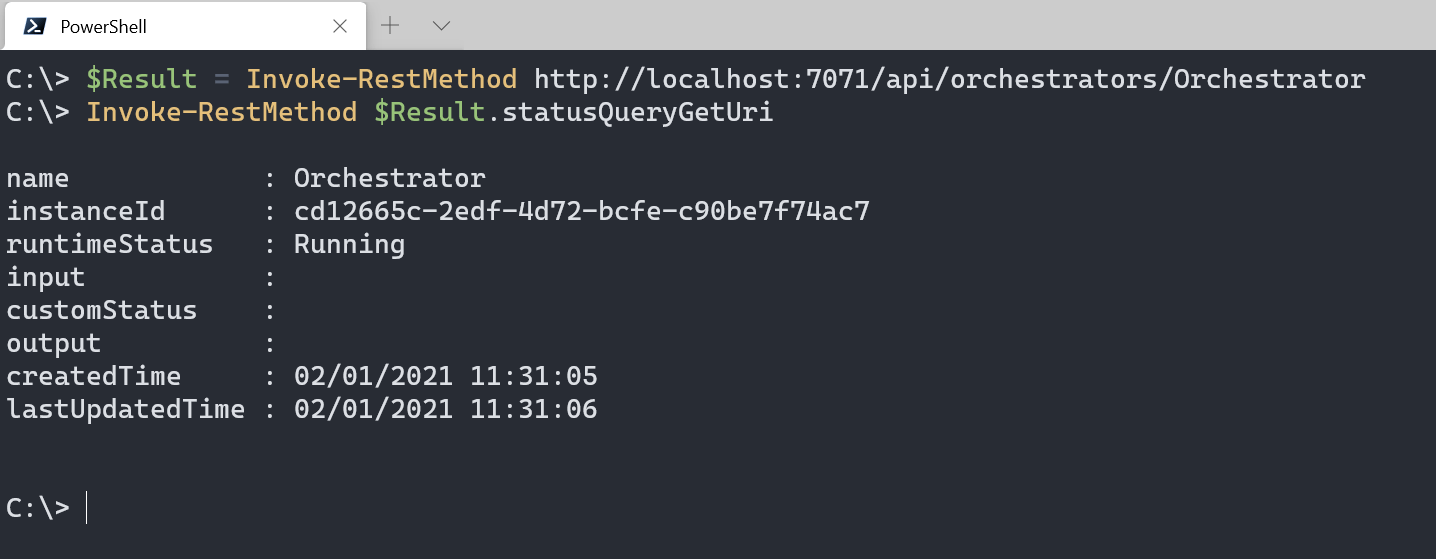
Instead of copying and pasting this URI, you can keep track of your function by assigning the above cmdlet to a variable like this:
$Result = Invoke-RestMethod http://localhost:7071/api/orchestrators/Orchestrator
You can now get the current status of your function by using:
Invoke-RestMethod $Result.statusQueryGetUri

This way you can keep track of the running function and get more information on it.
We will be using this method throughout this post.
Function Chaining: find a storage account name and create a storage account
We have the base of a function set up, let’s actually get is working. We will first make use of the function Chaining pattern, which you can find some explanation about here.
For this function, we first call getstorageaccountname and then use the result of that function to actually create a storage account with newstorageaccount.
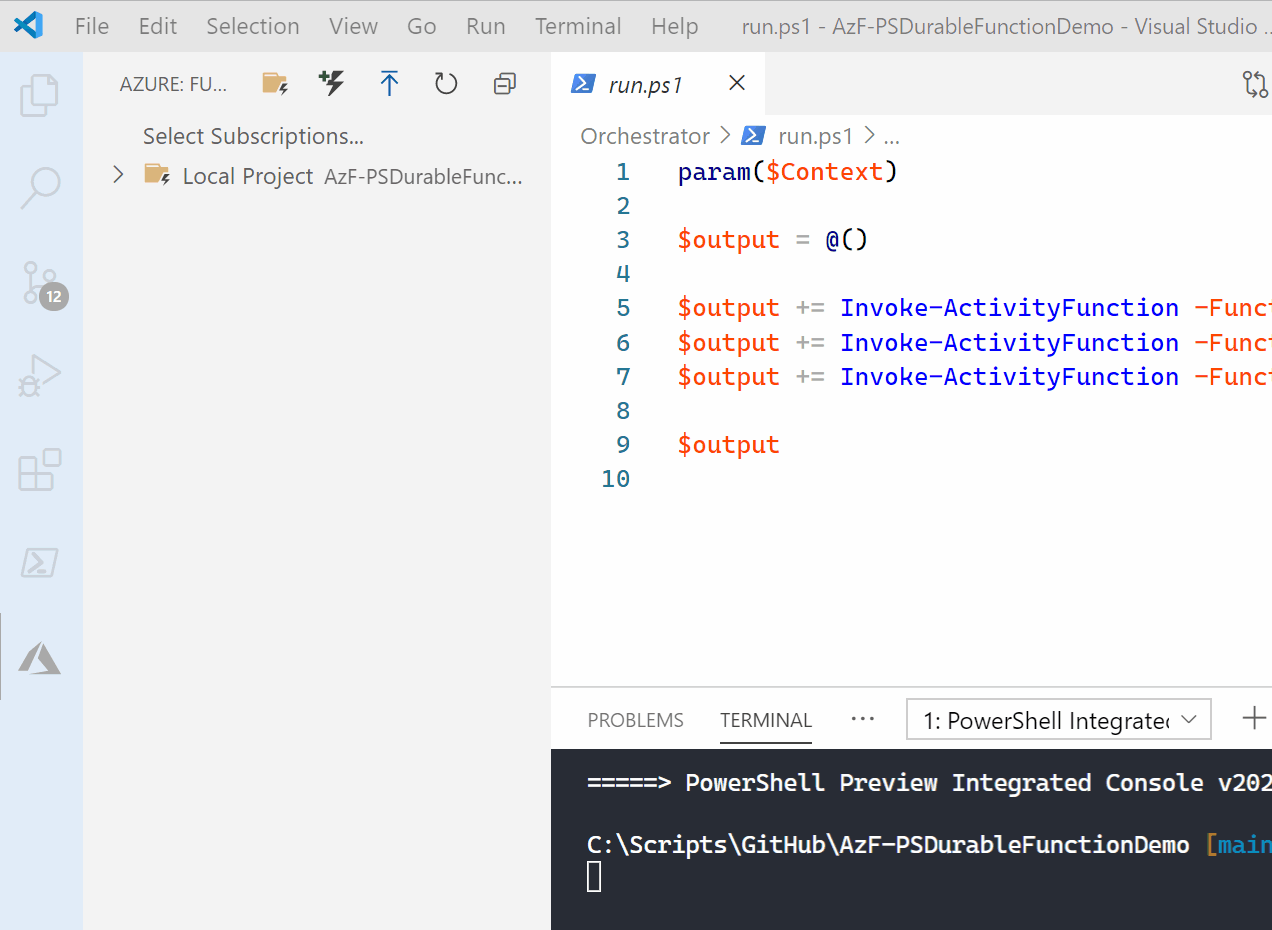
To do this, open up run.ps1 in the orchestrator function.
Remove the existing code and replace it with the following:
param($Context)

# Get the name of the storage account.
# It is returned to $StorageAccountName in the function
$StorageAccountName = Invoke-ActivityFunction -FunctionName 'getstorageaccountname'

# use the storageaccountname to create a storageaccount.
Invoke-ActivityFunction -FunctionName 'newstorageaccount' -input $StorageAccountName
# Return the storage account name
$StorageAccountName
The function getstorageaccountname is called first. This function returns a usable storage account name. This is then stored in the variable $StorageAccountName.
When calling newStorageAccount $StorageAccountName is used as input. This is a way to pass on parameters to the action functions.
Let’s see how it works
Note: this function will create a storage account in the resource group you provided. You have to have a connection to Azure to make it work.
Start the function core tools with func start and in a different terminal, use the following commands again:
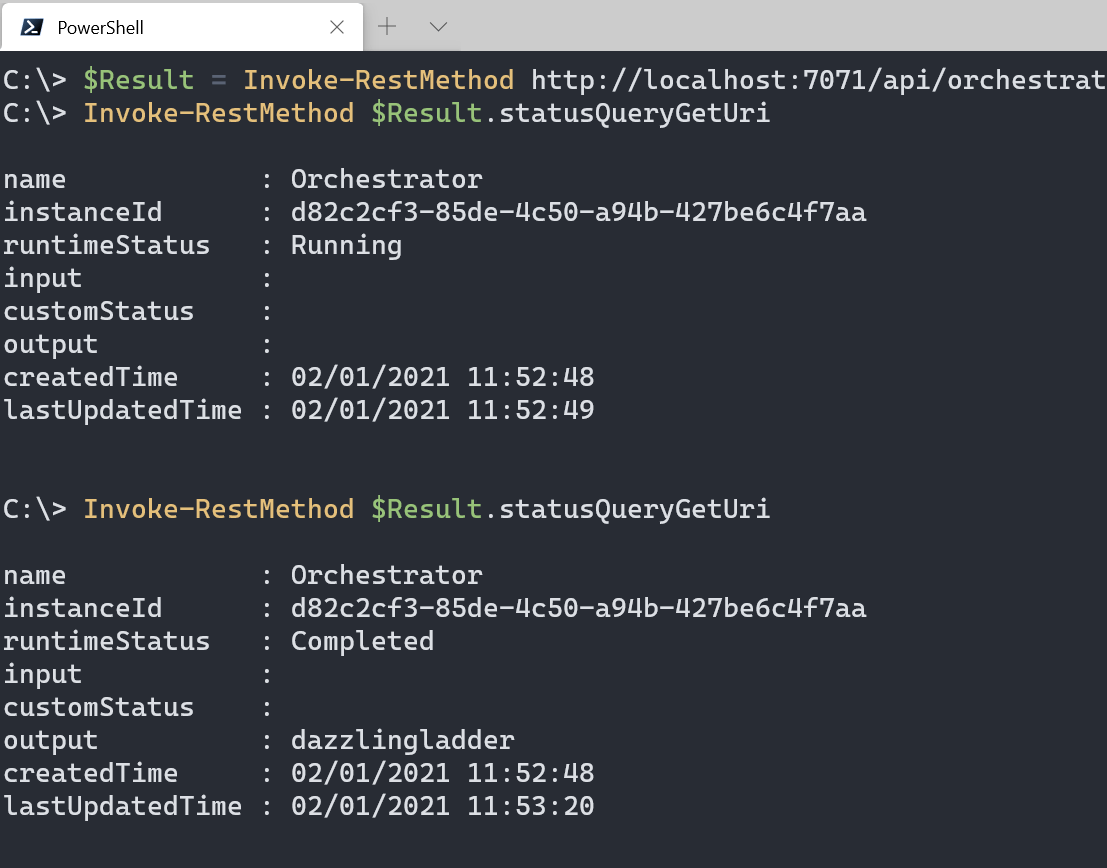
$Result = Invoke-RestMethod http://localhost:7071/api/orchestrators/Orchestrator
Invoke-RestMethod $Result.statusQueryGetUri
If you see errors in the log stream in Visuals Studio Code, there might be some old calls lingering in the storage account. Clean them up by using func durable purge-history, then try again
As you see, the runtimeStatus is now running. You can keep running the last Invoke-RestMethod cmdlet until the runtimeStatus changes to Completed. You will at that point also see the output, which is the name of the storage account that was created.
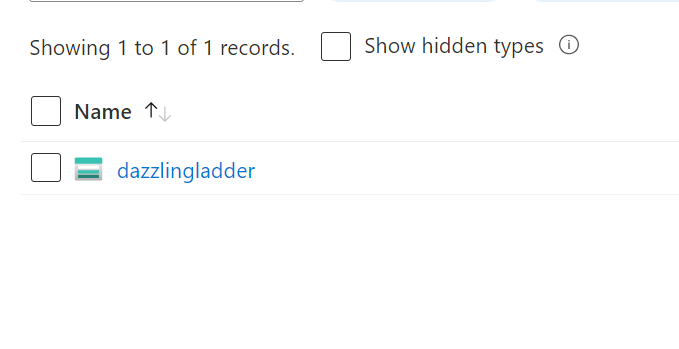
If we look in the Azure portal, we will find the storage account.
Function fan: Creating multiple storage accounts
Let’s take this a step further: By using the fan out/fan in pattern, we are able to create multiple storage accounts within the durable function.
The goal is to enter a number as the function is called. That number of storage accounts is created. As we will still use the generated storage account name, we will make use of both a chain and a fan function.
As for the PowerShell logic, we could reach the result by using a for loop. But if we do that, the structure might get confusing because we want two functions to run in a row. That makes it harder to run the functions simultaneously.
So we will split it up into two different loops.
Bringing the number to the orchestrator
We want to pass the number in the query from the http request into the orchestrator. To do this, you change one line in the HTTPStart run.ps1 file, the one where you start the orchestration. You should change it to this:
$InstanceId = Start-NewOrchestration -FunctionName $FunctionName -input $Request.query.number
Your HTTP request should now look like this file.
Next, we will use this input in the orchestrator file.
To do that, add the following line to the orchestrator file
[int]$MaxCount = $Context.input
You are now able to use maxCount in a for loop.
Create the for loop to generate the names
We will generate storage account names, based on the $MaxCount. To do this, create an array where each storage account name is added to. This code will look like this:
$StorageAccountNames = @()
for ($i = 1; $i -le $MaxCount; $i++) {
    Write-Host "This is loop $i"
    $StorageAccountNames += Invoke-ActivityFunction -FunctionName 'getstorageaccountname'
}
Create the storage accounts
With the storage account names set, we walk through the array to create the storage accounts. The reason why they are in a separate loop, is so they can all be created at once, saving time. To make sure they start running at the same time, you add -NoWait to the Invoke-ActivityFunction cmdlet. So this loop will look like this
Foreach ($StorageAccountName in $StorageAccountNames) {
    Write-Host "StorageAccountName: $StorageAccountName"
    $Function = Invoke-ActivityFunction -FunctionName 'newStorageAccount' -input $StorageAccountName -noWait
}
Now you can remove the old code and add $StorageAccountNames at the end, so the value is returned as output for the function. The result should look like this file.
Change the concurrency
By default, only one stream of PowerShell will run at the same time. To make use of the fanning, you need to change the concurrency. You can do this by changing the app setting in local.settings.json and then later in the app settings.

Find more information on this setting here.
When you call the function, you can now add a number to the URL
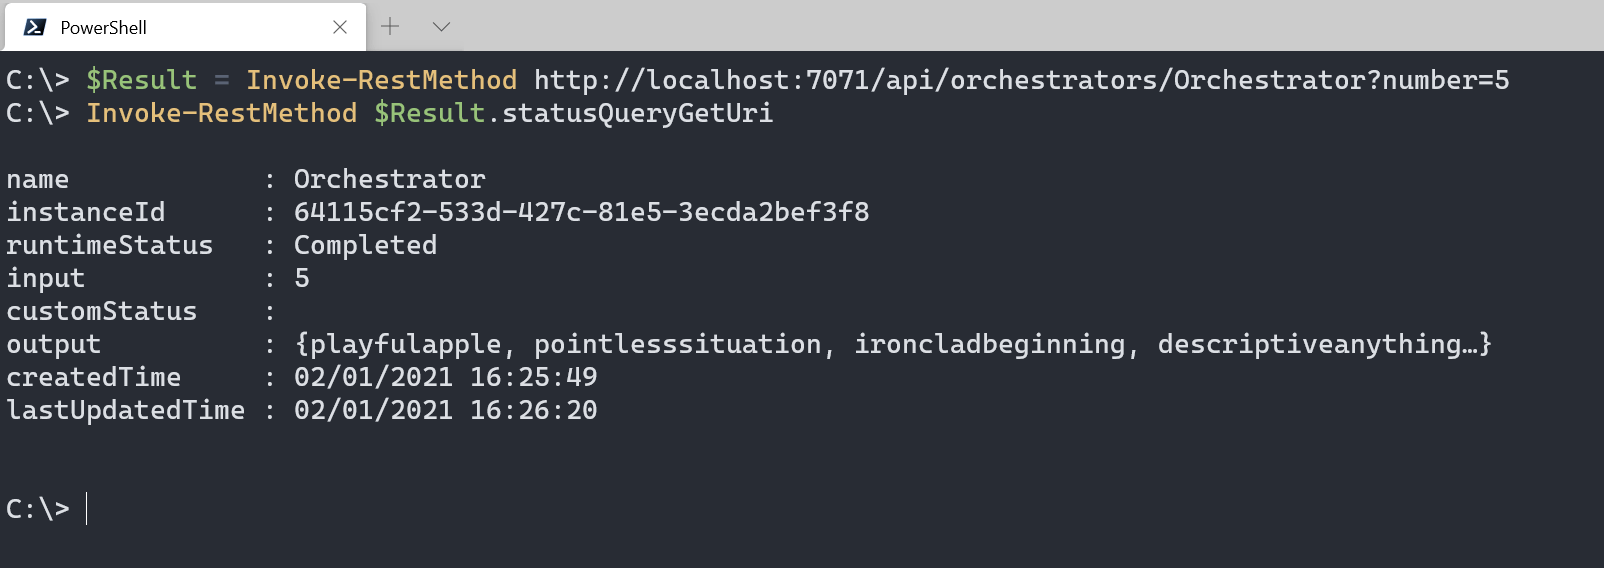
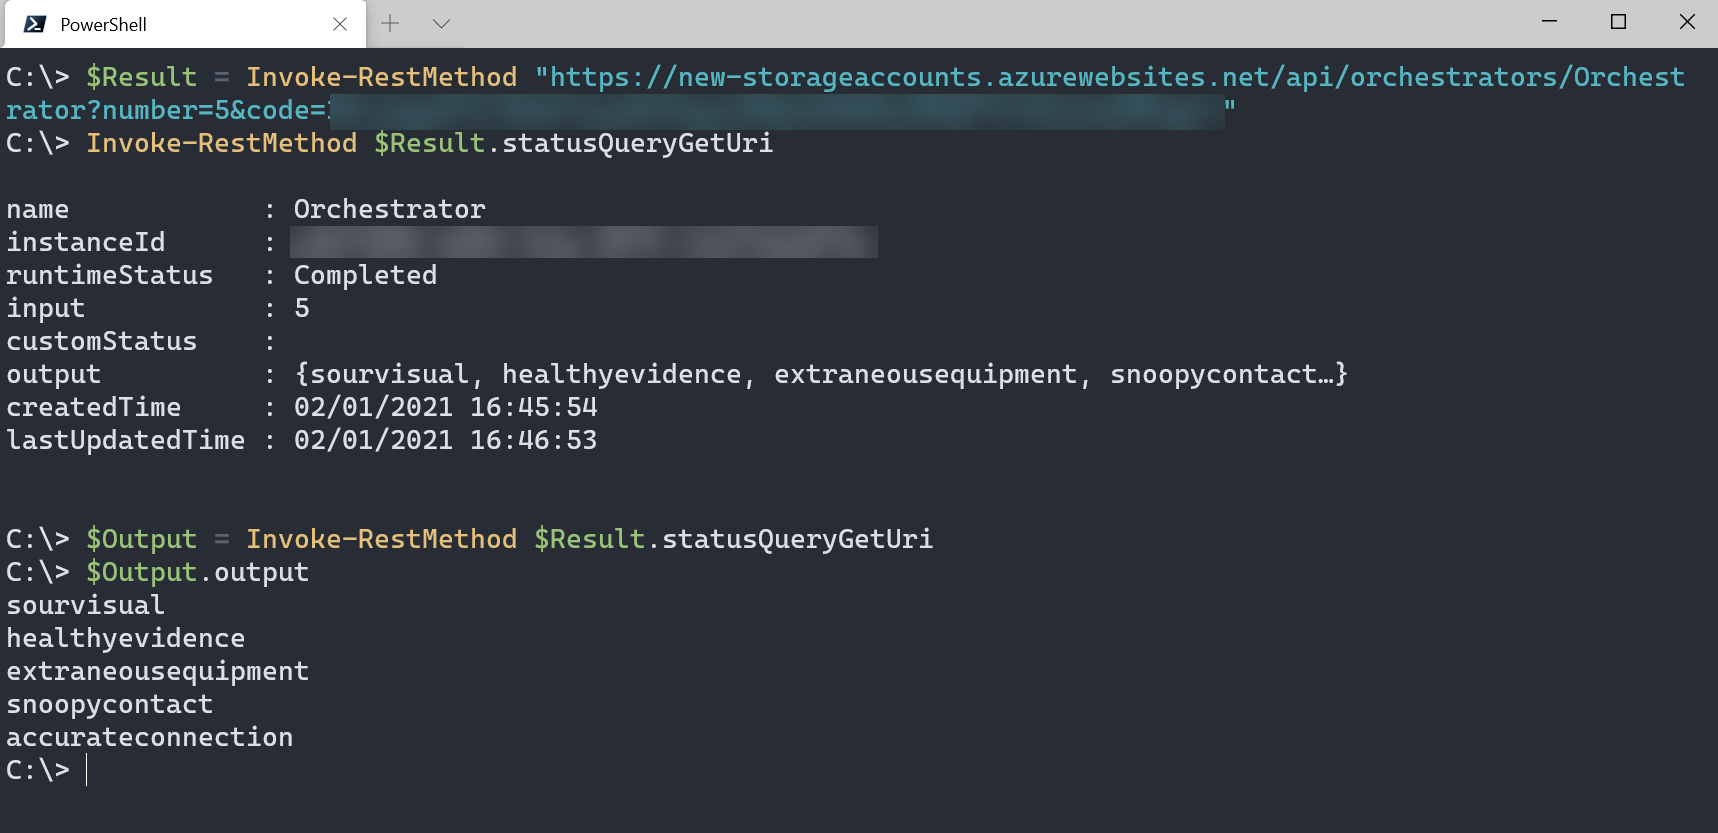
$Result = Invoke-RestMethod http://localhost:7071/api/orchestrators/Orchestrator?number=5
And it will create 5 storage accounts for you
Deploy to Azure
With the function now working correctly, you are able to deploy it to Azure, directly from Visual Studio Code.
If you want to do so, you should take care of a few things:
- Go into the function.json file of HTTPStarter and change the authlevel to Function
“authLevel“: “function“
You do this because this function is able to create storage accounts in your subscription. When you use it locally, you can allow anonymous authentication as it is easier for testing. But if you would allow anonymous authentication once the function is on Azure, it is open for the public to call, which you don’t want obviously.
If you change the authlevel to function, you still call the function the same way. Just add the key from the HTTP function to the end of the URL you are calling
- The function needs to get a managed identity and permissions to create a storage account. If you want to know how that works you can take a look at my previous post.
- The function needs parts of the Az module. By default, the reqirements.psd1 file will install the full Az module, which can take quite some time. To make it run faster, you can specify specific modules in the requirements.psd1 file. Change the Az module settings to the following:
@{
‘Az.Accounts’ = ‘2.*’
‘Az.Storage’ = ‘3.*’
}
- Don’t forget to add the appsetting to change the concurrency to the Azure application
After you have complete these steps, calling the function in Azure is very simular as doing so locally.
To check if all your files are correct, find the whole function here.
Conclusion
So we now have worked with the two different pattern you are able to use for PowerShell functions at this point. I hope this practical example helps you to start working with Azure PowerShell Durable functions yourself.
If you want to find all the files mentioned in one repository, you can find them here.
If you have any questions left, please leave a comment below!


Thanks for sharing this article on PowerShell,
You told with step by step detail way it easy to understand.?