I have written posts before about creating an Azure DevOps pipeline for Azure functions and creating a GitHub Actions workflow for ARM templates. In this post, I want to give you a step by step guide on how you can deploy Azure PowerShell Functions with GitHub Actions.
What will this post cover
GitHub Actions give you the option to create a CICD workflow that can deploy directly to Azure. The technology is actively developed and getting more and more options to work with.
In this post we will go through the process to deploy Azure PowerShell Functions with GitHub Actions. I think this will translat to other languages pretty well. The workflow will first deploy the function if it does not exist. After that it will use the publish profile to deploy the PowerShell code in the repository to Azure. I have found some great resources that go into the depth of what happens which I will link on the way.
If you have created your own pipeline and understand the process, you might want to consider to add some testing as well.
Note: Because GitHub Actions are community driven, there are multiple ways to reach the same goal. This is just one way to deploy an Azure Function. If you work through it and find a way that fits better for you, don’t be afraid to experiment and make changes.
Set up your GitHub environment
To follow along with this guide, you need a GitHub repository to work with. To get this ready, consider the following pointers:
- You need a GitHub account. You can make one for free here.
- Being familiar with basic GIT concepts helps the process a lot. If you are not, find out more about getting started with GIT here.
- We start with a repository that has the code for a PowerShell function app. We use the default code that is created when you start a http request function. You can create your own, or make use of a repository I have created. This repo also includes all the other scripts that are mentioned in this guide. Find it here and fork or download it to your own environment.
Note: the first steps of this guide are the same as in in this post where I showed a GitHub workflow for ARM templates. I made some small updates, but if you are familiar with that post and that process, you can move on to set the environment variables.
Set up Azure Credentials in GitHub
First, we need to make sure the Workflow can connect to Azure.
To deploy to Azure, you need to create an Azure Service Principal and give it permissions to create resources. After that we can collect the ClientID, the clientSecret, the SubscriptionId and the tenantID of that service principal.
To make this process a bit faster, we are going to use a PowerShell script.
Change the variables in the script below and run it either locally or in the Cloud Shell. If you run it locally, you need to install the Az Module and connect to Azure.
Note: By default the new service principal will get contributor permissions to the subscription. If this does not fit your needs, you can change this manually.
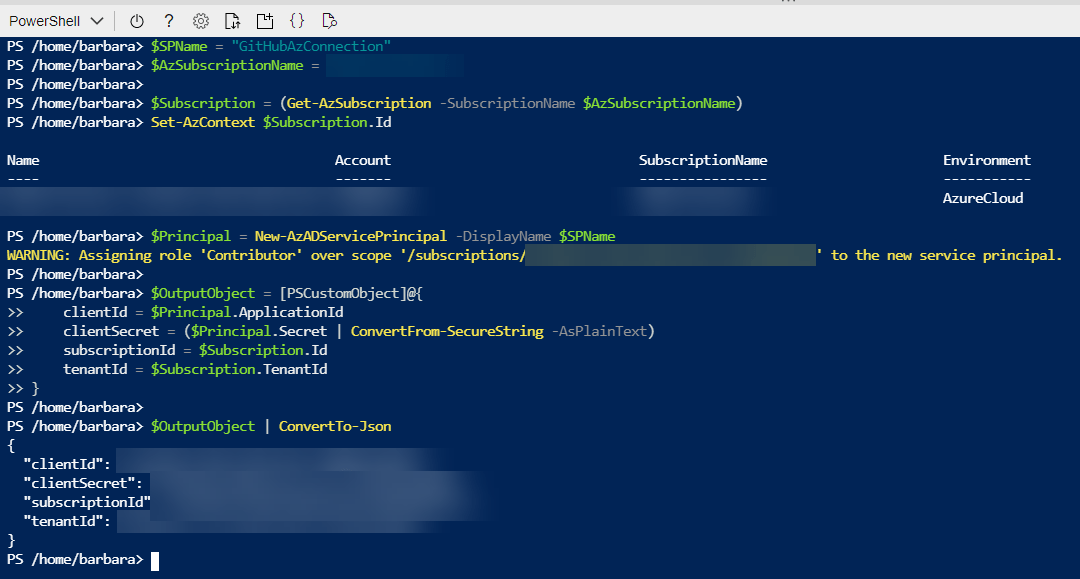
Now, you can copy the part between the brackets at the final output. This will leave you with a JSON object that looks like this (with different values of course).
{
    "clientId": "12345678-1234-abcd-1234-12345678abcd",
    "clientSecret": "abcdefghijklmnopqrstuwvxyz1234567890=",
    "subscriptionId": "12345678-1234-abcd-1234-12345678abcd",
    "tenantId": "12345678-1234-abcd-1234-12345678abcd"
}
Store the Azure Credentials
Open the GitHub repository in your browser.
Click Settings in the menu all the way to the right.

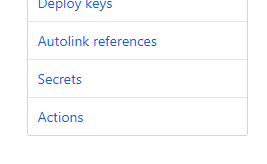
In the left menu, select secrets.
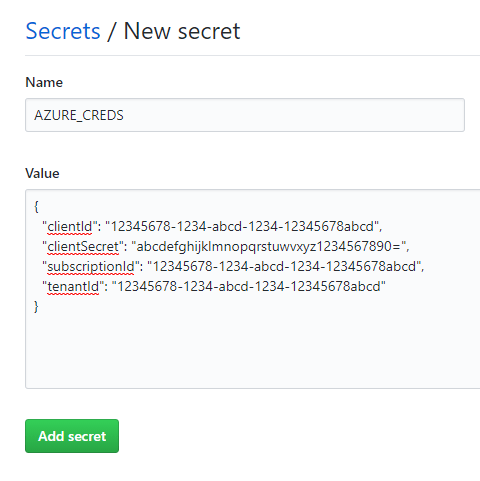
As you can see, you can safely store secrets here to use in the pipeline. You will not be able to view the secrets later, although you will be able to use them. Select New Secret at the top right.
Fill in the name AZURE_CREDS (or another name if you prefer, but this is what I will be using here. Copy and paste the JSON object you created earlier in the value box and click Add secret.
Create the GitHub workflow file
Let’s move on the the actual GitHub Actions. In the menu at the top, click Actions.

If you scroll down this page, you will find a lot of example workflows, which show the possibilities of GitHub Actions. For our use case, we are going to create the workflow with the Simple Workflow. Click Set up this workflow.
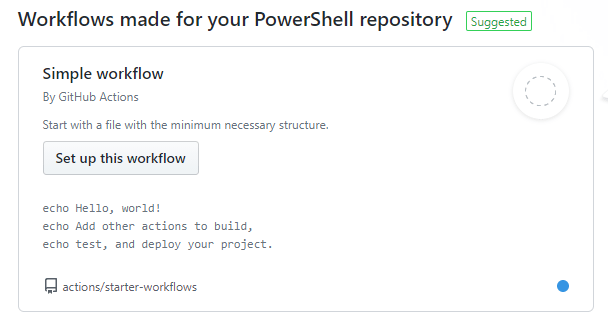
You now get a basic overview of what a GitHub Actions workflow could look like.
First, change the name of the file. You can select a name that works for you, I chose
AzFDeploy.yml.

Let’s walk through the elements we can now see on the screen.
Name
You can create a name for the workflow, which will become handy when you are using multiple workflows for the repository.
On
This defines what action will trigger the workflow. The default is to run only when a commit to the main branch is made. As this workflow will deploy directly to Azure, we will leave it like that. The other element you see here is workflow_dispatch, which will enable you to start the workflow manually from the browser.
Jobs
You can create multiple jobs to store the actions in. Each job can be run on a different agent. For this pipeline one job will be enough. It is called build by default, but we will rename it to deploy.
Runs-on
Here you can define the OS of the agent you want to use. We will leave the default.
Uses: actions/checkout
This default action is used to access the code in the repository.
Other tasks
The other tasks are example tasks to create Hello-World actions.
We will remove them.
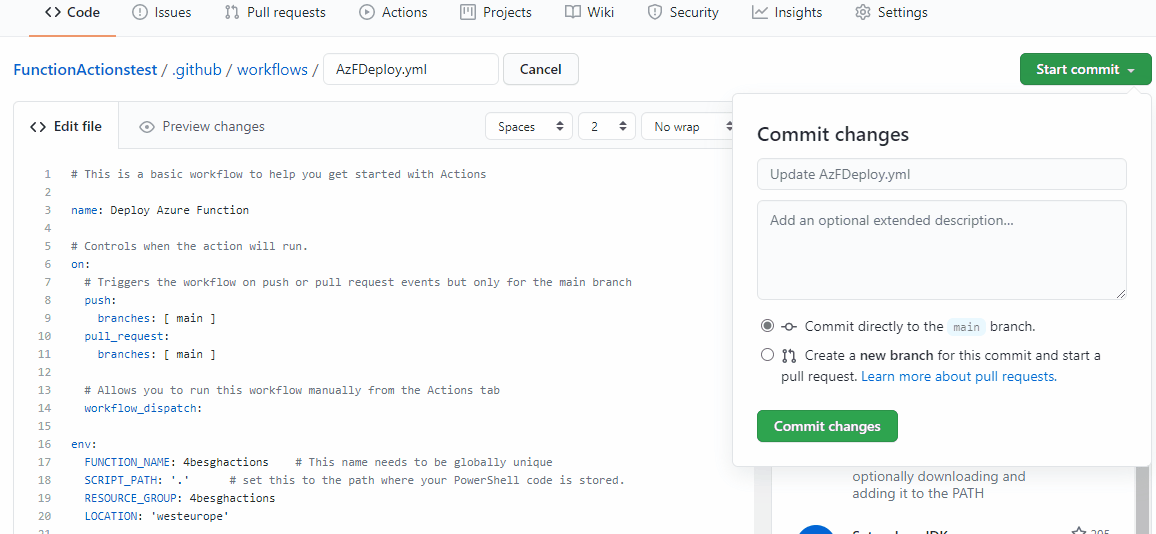
You should now have the following code:
# This is a basic workflow to help you get started with Actions

name: Deploy Azure Function

# Controls when the action will run.
on:
  # Triggers the workflow on push or pull request events but only for the main branch
  push:
    branches: [ main ]
  pull_request:
    branches: [ main ]

  # Allows you to run this workflow manually from the Actions tab
  workflow_dispatch:

env:
  FUNCTION_NAME: 4besghactions2    # This name needs to be globally unique
  SCRIPT_PATH: '.'      # set this to the path where your PowerShell code is stored.
  RESOURCE_GROUP: 4besghactions2
  LOCATION: 'westeurope'

# A workflow run is made up of one or more jobs that can run sequentially or in parallel
jobs:
  # This workflow contains a single job called "build"
  deploy:
    # The type of runner that the job will run on
    runs-on: ubuntu-latest

    # Steps represent a sequence of tasks that will be executed as part of the job
    steps:
      # Checks-out your repository under $GITHUB_WORKSPACE, so your job can access it
      - uses: actions/checkout@v2
Set environment variables
To simplify the process of using this workflow for other Functions, we are going to create some environment variables. We will use them in the tasks that follow.
We define the following variables:
– The name of the function. Note that this needs to be globally unique
– The Resource group where the function lives or will live
– The location of both the function and the resource group
– The path of the PowerShell code. You can define the root folder with a dot.
Fill out the values in the following syntax.
env:
  FUNCTION_NAME: 4besghactions    # This name needs to be globally unique
  SCRIPT_PATH: '.'      # set this to the path where your PowerShell code is stored.
  RESOURCE_GROUP: 4besghactions
  LOCATION: 'westeurope'
Add tasks
To find tasks, you use the marketplace, which you can find at the right of the screen. Here are tasks provided by GitHub or Microsoft, but also a lot of tasks that the community has created. If you start typing in the search bar, the tasks will start appearing.
First, we need to connect to Azure. Search for Azure Login to find the Azure Login task.
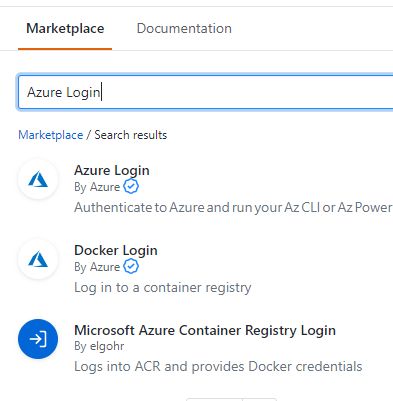
Click the Azure Login.

All tasks have a similar interface. If you click View Full Marketplace listing, you get more information about the task. For now, just copy and paste the code snippet into the YAML file. You might have to fix indentation, it needs to be the same as in the snippet.
Tip: If you want to change indentation on multiple lines at once, hold alt and then click & drag across the lines. If you press space now you all the lines will move.
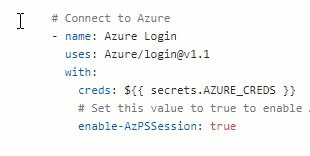
After creds:, enter ${{ secrets.AZURE_CREDS }}. This will add the secret we created earlier. As we will use Azure PowerShell in this workflow, so after enable-AzPSSession, type true. You’re task should now look like this:

Use PowerShell to deploy the function
First things first, we will deploy the function itself. Often for this kind of workflows the function is created already and the pipeline focusses on deploying the code. I want to have a pipeline that can run without another interaction with Azure, so I want to deploy the function as well.
While we could use ARM templates, I decided to use PowerShell for this deployment.
I made a small script that checks if the function already exists. If not, it will deploy it.
You need to store the script in the repository you are working with. I did this in the example repo, you can find it here.
To call the script from the workflow, we use the Azure PowerShell Action. You can find it like you found the Azure login task: by searching in the marketplace.
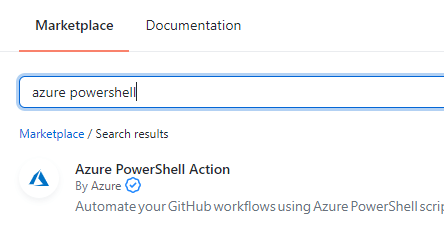
Copy and paste the given code to your workflow file. The indentation might be wrong again, so make sure it is the same as the example on the right.
Now you can fill in the values for the task. In this task, we will call the script and make use of the environment variables we created before. Fill out the values so the step looks like this:
      # Deploy the Function
      - name: Azure PowerShell Action
        uses: Azure/powershell@v1
        with:
          # Specify the Az PowerShell script here.
          # Specify the Az PowerShell script here.
          inlineScript:
            .\deployFA.ps1 -FunctionName ${{ env.FUNCTION_NAME }} -FunctionResourceGroup ${{ env.RESOURCE_GROUP }} -Location ${{ env.LOCATION }}
          # Azure PS version to be used to execute the script, example: 1.8.0, 2.8.0, 3.4.0. To use the latest version, specify "latest".
          azPSVersion: latest
Get the publish profile
The function would now have been deployed to Azure. There are two ways to get access to the function: Make use of an RBAC connection, or use the publish profile.
We could for this step easily use RBAC, as we already have a connection set up. But using the publish profile is the overall recommended method, as can be found on this page (which by the way also offers some great explanations around this process). For this reason we will use a publish profile.
You can collect the publish profile manually in the portal, but of course, we want to do it automatically.
We are going to make use of the tasks that have been created by Justin Yoo.
Justin wrote an extensive blogpost about how he came to create these action, which explanes what we are doing. I really recommend reading it!
So we want to get the publish code from the existing function app.
In the marketplace to the right, search for publish profile. Select the action by aliencube.
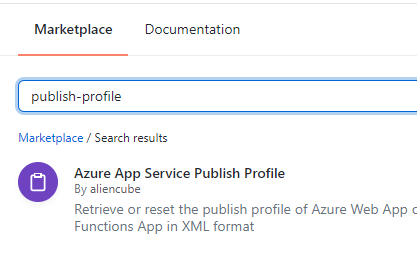
Copy and paste the code into the workflow again. You can now use the environment variables we created before to fill in this task. Delete the reset line as we will not use it for this step. We will give this step an id. You can add the line id: publishprofile in the code. I will explain why in the next step. Your result should look like this:
      # Get the publish profile
      - name: Azure App Service Publish Profile
        uses: aliencube/publish-profile-actions@v1.2.0
        id: publishprofile
        with:
          # Resource group name.
          resourceGroupName: ${{ env.RESOURCE_GROUP }}
          # App instance name.
          appName: ${{ env.FUNCTION_NAME }}
Deploy the code
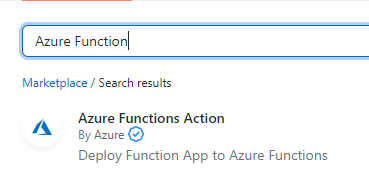
Finally, we are going to do the actual deployment of the code. There is an action available for that created by Microsoft. Find it by searching for Azure Function. Select Azure Functions Action and past the code into your workflow.
For the app-name and the package, you can use the environment variables you created before. The slot-name is optional and can be ignored for this example.
You need to define the publish-profile, for which we will use the publish profile that you collected in the previous step. You can refer to that output by the id we set in the previous step. To collect the output in this example, you use ${{ steps.publishprofile.outputs.profile }} . The result should now look like this:
     # Deploy the Code
      - name: Azure Functions Action
        uses: Azure/functions-action@v1.1.8
        with:
          # Name of the Azure Function App
          app-name: ${{ env.FUNCTION_NAME }}
          # Path to package or folder. *.zip or a folder to deploy
          package: ${{ env.SCRIPT_PATH }}
          # Publish profile (*.publishsettings) file contents with web deploy secrets
          publish-profile: ${{ steps.publishprofile.outputs.profile }}
Reset the publish profile
So now the deployment is done and we could call it a day. But it is a good idea to reset the publish profile of you app for security reasons. Want to know exactly why? Read about it in the post I mentioned before.
To reset the publish profile, you will use the same step as the one you used to collect the publish profile, but make use of the reset parameter. Most other settings are the same as before. This should result in the following code:
      - name: Azure App Service Publish Profile
        uses: aliencube/publish-profile-actions@v1.2.0
        with:
          # Resource group name.
          resourceGroupName: ${{ env.RESOURCE_GROUP }}
          # App instance name.
          appName: ${{ env.FUNCTION_NAME }}
          # Value indicating whether to reset the publish profile or not.
          reset: true
Save and run the workflow
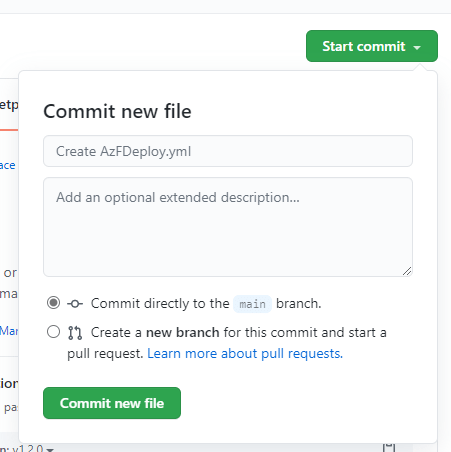
We are now ready to deploy Azure PowerShell Functions with GitHub Actions. The workflow is finished and you can now save it. When you do so, the result will be committed to main, which means it will directly start running.
Note: if you are not comfortable with starting the deployment, you can save the file to a branch to prevent that from happening.
Save the file by clicking Start commit and then Commit new file.
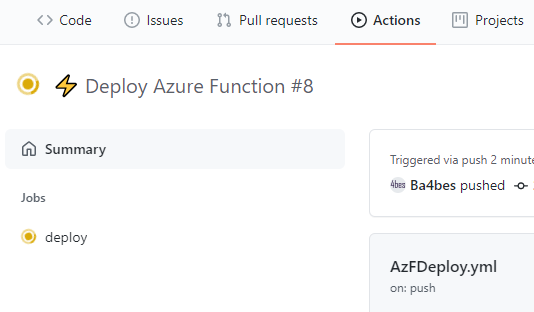
The screen now returns to the code in the repo. But in the background, your workflow will have started. Open Actions to find what it is doing.
You can open the workflow all the way up to find what is happening. There might be some errors in the output, but don’t worry, not all of them are breaking errors. In the end, you can look at the Azure portal to find if your function has deployed.
Conclusion
So this is how you can deploy Azure PowerShell Functions with GitHub Actions. Because code changes will be deployed directly to Azure, you will have the tools to create a very consistent environment. You can find all the code that was used in this repository.
If you have any questions, please let me know in the comments!


Thank you very much for sharing. It’s a piece of great information for a beginner?.
Pingback:PowerShell Weekly Newsletter | Ridicurious.com
Pingback:Azure Functions Live – January 2021 – MachineLearningCloudComputing.com
Pingback:Weekly Newsletter – PowerShell Digest #014 - Software Mile.com
Informative article. Helped me complete a scenario rather quickly.
Appreciate sharing the information!